

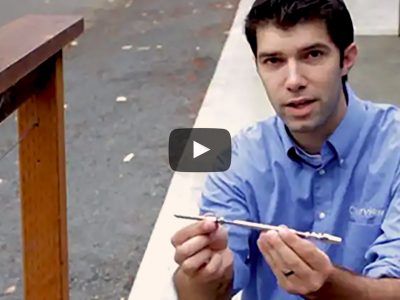
How-To Video: DIY Lag Terminal Installation for a Cable Railing with Wood Posts
Transcription:
Hello. My name Brandon with AGS Stainless.
Today in this video, what we’ll be doing is showing you how to install lag terminals and adjustable lag terminals into four by four wood post.
Okay. What we have here is the lag terminal assembly. The lag terminal is comprised of five different parts. First, we have the collar right here. Then we have the jaws. There’s three jaws in there that go around the cable and lock it in place. And then the washer, which sites up against the lag terminal here. And this is the jam nut, which we’ll use to tension or lock up against the collar there after it’s installed. So, if the first thing you want to do is slide the collar over the cable. And you want to put the jaws like that. And then you put this washer over the cable there. This is a ten-millimeter nut and this is a twelve-millimeter nut. This is also a twelve-millimeter nut over here. So, the cable just goes in.
Okay. So, when you’re installing the lag terminals, the first thing you want to do is pre-drill the hole. We’ve got treated four by four lumber. And so you put that on there. Tighten this up. Put a jam nut on there first. We’ll make sure that cable is seated all the way into the lag terminal. Your bass collar is there. Pull the jaws all the way down and slide the collar back over it. Jere’s the number twelve wrench to tighten the two nuts against each other.
Okay. So, now we’re going to be installing our adjustable lag terminal – one of the first things you want to do. This is all the way closed up. Because it’s adjustable, you want to open it up a little bit and then you could take these off too. The collar and the jam nut – you could take those off so that you can use the number ten over here and you can use a socket on a socket style wrench like we’ve got here. Okay. So, now we’ve got our adjustable lag terminal installed.
Okay. We’ve got the lag terminals installed now and all we need to do is tension the cable. To do that, you take a small screwdriver that will fit through the hole in the lag terminal there and you just turn that turnbuckle in the direction that tensions the cable. You can see it coming up. You just tension it enough to where there’s no slack showing in the cable and just a little bit more. Once you’ve got that tension, you just pull these jam nuts back to the turnbuckle on the lag terminal and cinch them down.
How-To Guide: How to Install a Wood Railing with Cable Infill in 18 Easy Steps by Using Lag Terminals and Adjustable Lag Terminals
Tools Needed:
- (2) 12mm wrenches
- 10mm wrench
- Drill
- 1/8-in Drill Bit
- 5/32-in Drill Bit
Step 1: Mark Post Locations
Put masking tape on the inside of the wood end posts and both sides of the wood intermediate posts. Mark the hole locations on the masking tape.
Step 2: Drill End Posts
Drill 1/8-in horizontal x 2-in deep pilot holes in all of the end posts. Pilot holes guide the Clearview® – Lag Terminals and the Clearview® – Lag Terminals – Adjustable as they are threaded into the posts. Additionally, pilot holes prevent cracking of the posts. Pilot holes should be drilled perpendicular to the mounting surfaces. Pilot holes are usually drilled a little deeper than the thread length for Clearview® – Lag Terminals and Clearview® – Lag Terminals – Adjustable.
Step 3: Drill Intermediate Posts
Drill 5/32-in horizontal through-holes in intermediate posts by drilling halfway through both sides. Drilling from each side will help keep the holes straight for both level and sloped conditions.
Step 4: Install One Side
Thread the Clearview® – Lag Terminals into the posts on one end of the cable run by using a 10mm wrench.
Step 5: Install Other Side
Thread the Clearview® – Lag Terminals – Adjustable into the posts on the other end of the cable run by using a 10mm wrench.
Step 6: Thread Intermediate Posts
Thread the uncoated 1/8-in stainless steel Clearview® – Cables through the intermediate posts. Clearview® – Cable Sleeves should be used to reinforce exit holes and prevent damage caused by tension when cables change direction at an angle.
Step 7: Attach One Side
On the non-adjustable Clearview® – Lag Terminal end of the cable rungs, loosen the cover piece until it is only held on by a couple of threads. Insert an uncoated 1/8-in stainless steel Clearview® – Cable into the jaws until it bottoms out. Snug the cover piece against the uncoated 1/8-in stainless steel Clearview® – Cable until finger-tight.
Step 8: Secure the Cable
Use a 12mm wrench on the cover piece and a 10mm wrench on the fitting body to snug the cover piece and lock the uncoated 1/8-in stainless steel Clearview® – Cable in place.
Step 9: Lock Cover Piece
Use (2) 12mm wrenches to snug the jam nut up against the cover piece and lock it in place.
Step 10: Repeat Step 7 with the Remaining Cables
Step 11: Adjust the Threads
Hold the end of the Clearview® – Lag Terminal – Adjustable and adjust the barrel until half of the threads are exposed.
Step 12: Mark the Cables
Pull each uncoated 1/8-in stainless steel Clearview® – Cable taut and mark it 1/8-in from the base of the threads that receive the cover piece.
Step 13: Cut the Cables
AGS – Cable Cutters feature hardened stainless steel jaws with shear blades that were specially designed with a bypass style for cutting metal cables. They provide clean, non-crushed cuts for uncoated 1/8-in stainless steel Clearview® – Cables.
Step 14: Attach One Side
On the Clearview® – Lag Terminal – Adjustable end of the runs, loosen the cover piece until it is only held on by a couple of threads. Insert an uncoated 1/8-in stainless steel Clearview® – Cable into the jaws until it bottoms out. Snug the cover piece against the uncoated 1/8-in stainless steel Clearview® – Cable until finger-tight.
Step 15: Secure Other Side
On the Clearview® – Lag Terminal – Adjustable end of the runs, use a 12mm wrench on the cover piece and a 10mm wrench on the fitting body to snug the cover piece and lock the Clearview® – Cable in place.
Step 16: Lock Other Side
On the Clearview® – Lag Terminal – Adjustable end of the runs, use (2) 12mm wrenches to snug the jam nut up against the cover piece and lock it in place.
Step 17: Tension the Cables
Start with the uncoated 1/8-in stainless steel Clearview® – Cable in the middle. Insert a small screwdriver or Allen wrench through the hole in the Clearview® – Lag Terminal – Adjustable barrel and tension the uncoated 1/8-in stainless steel Clearview® – Cable until just the slack is taken out. Then tension the cable above the middle cable and the cable below the middle cable. Continue tensioning by alternating between the cables above the middle cable and the cables below the middle cable. DO NOT OVERTENSION!
Step 18: Lock the Barrels
Finger-tighten both nuts against the barrel and snug with a 10mm wrench while holding the barrel stationary with a small screwdriver.
Featured Hardware
Railing Components
Railing Systems
Recommended For You
Explore design trends and insights from architects, our customers and the AGS team.
-
 Videos
How to Crimp an AGS Cable Fitting
Install Rainier cable infill with standard fittings by following these steps. This will help ensure a secure, professional finish with lasting durability.
-
 Videos
How to Install an AGS Standard Cable Fitting
https://vimeo.com/1050856505/349c309cf3?fl=pl&fe=sh Install Rainier cable infill with standard fittings by following these steps. This will help ensure a secure, professional finish with lasting...
-
 Videos
How to Install an AGS Barrel Nut Fitting
https://vimeo.com/1050845087/6372fa1493?fl=pl&fe=sh Install Rainier cable infill with barrel nut fittings by following these steps. This will help ensure a secure, professional finish with...