


Installing with Acorn and Jam Nuts
Comprehensive resources to guide you through a standard installation with acorn and jam nuts. From crimping to final assembly, we provide everything you need to ensure a professional result.
Precision Tool Checklist
- AGS Cable Cutters
Bypass-style cutters cut cable cleanly and minimize fraying - AGS Crimpers
Hardened steel jaw crimpers provide an even and secure crimp - 7/16” Wrenches (2)
For tightening acorn and jam nuts - Eye Protection
Essential safety gear, especially when cutting cable - Painter’s Tape
Safety Tip: Use to wrap the tip of the cable when cutting short lengths to prevent strands from becoming projectiles - Rubber Mallet
Gently correct any distortion that may occur from crimping
Standard Installation with Acorn and Jam Nuts
A standard infill features a factory-finished fitting on one end of each cable length. With this installation, an acorn and jam nut assembly anchor the cable to your terminal posts.
- Prepare the Fitting: Screw a jam nut onto the fitting so the threads extend 1/4” beyond the nut. Using 7/16” wrenches, tighten an acorn nut against the jam nut, locking it in place.
- Run the Cable: Thread the bare end of the cable through all posts in the designated railing section, ensuring the factory-crimped fitting is seated against the first post.
- Measure and Cut: Pull the cable taut. Cut the cable 3/8” from the inside edge of the last post.
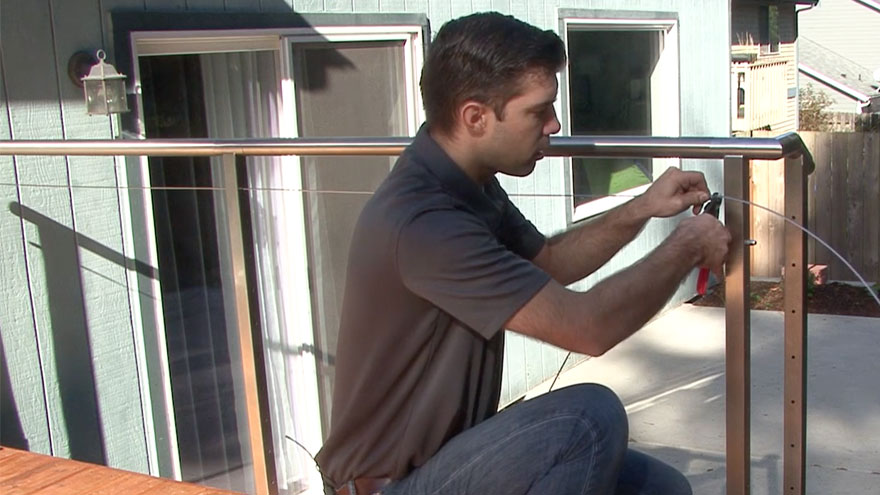
Safety tip: If you are cutting less than a few inches of cable, put some tape around the tip of the cable to prevent the strands from becoming projectiles. - Crimp the Fitting: Insert the cable all the way into the fitting. Crimp the fitting approximately 1/4” from the end. Crimp again 1/4” from the first crimp
If any distortion occurs from crimping, it can be easily corrected by tapping gently with a rubber mallet. - Final Assembly: Screw an acorn and jam nut onto the fitting. Repeat this process for all cables in the run before tensioning.
Important: To prevent over-tightening, refer to your Rainier Installation Guide before tensioning the cable.